1. How to screen record on Windows 10?
On Windows 10, you can record your screen using the built-in tool – Game Bar. It was designed essentially to capture PC and Xbox gaming sessions, but it can also be used to record other apps and activities.
First, enable Game Mode on your system:
Step 1: Click on the start menu and then select settings

Step 2: From the Settings window, Click on Gaming.

Step 3: Go to Game Mode and enable Game Mode

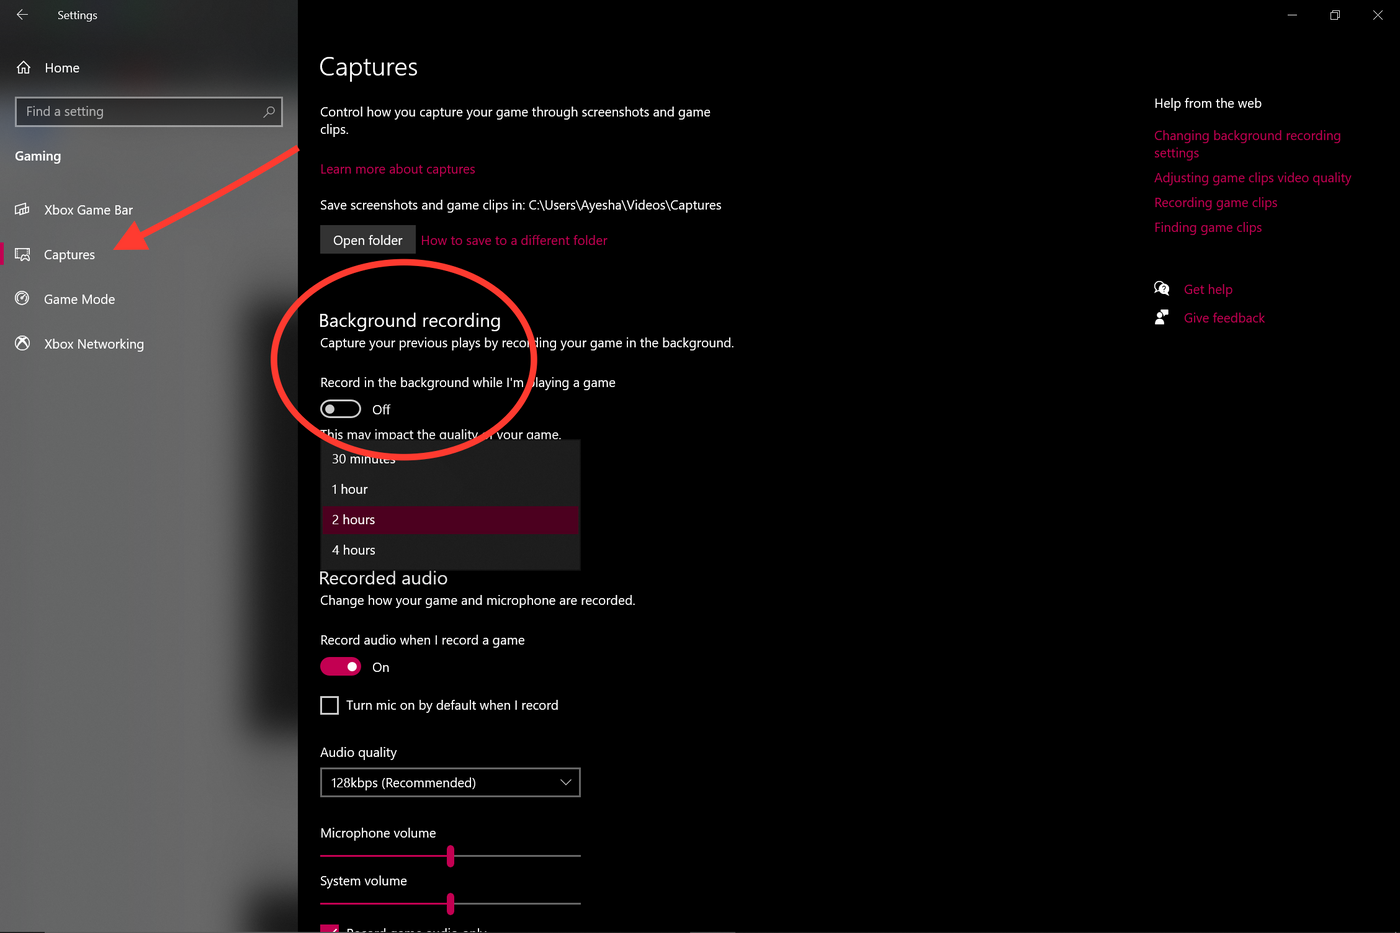
Note: To check the maximum duration of how long a screen recording can be, head over to Game Bar’s settings. Click on the Start menu and hit Settings. Click on Gaming. Under Captures will be the option for Background Recording. Select from the maximum recording time drop-down from 30 minutes to 4 hours.
Now you’re all set to record your screen. Windows 10 Game Bar can only support screen recording of one application at a time. This means, you can’t switch to recording another window or ALT + TAB your way after you’ve started recording. Also note that you cannot record your Desktop or File Explorer or Maps.
With that, let’s get down to the steps you can use to record your screen using the Game Bar.
Step 1: Open the app you want to record. Close other windows and make sure there’s no unwanted audio that will sneak its way into your recording.
Step 2: Press the Windows + G on your keyboard. This should open up the Game Bar.

Step 3: In the ‘Capture’ window, click on the Camera icon to take a screenshot. To start recording your screen, click on the circle with the dot (or press Windows + Alt + R).

Step 4: Once you start recording, a capture status with a timer, recording controls and a microphone will appear. The mic is to switch on and off external sounds to record commentary. Internal sounds will be recorded by default.
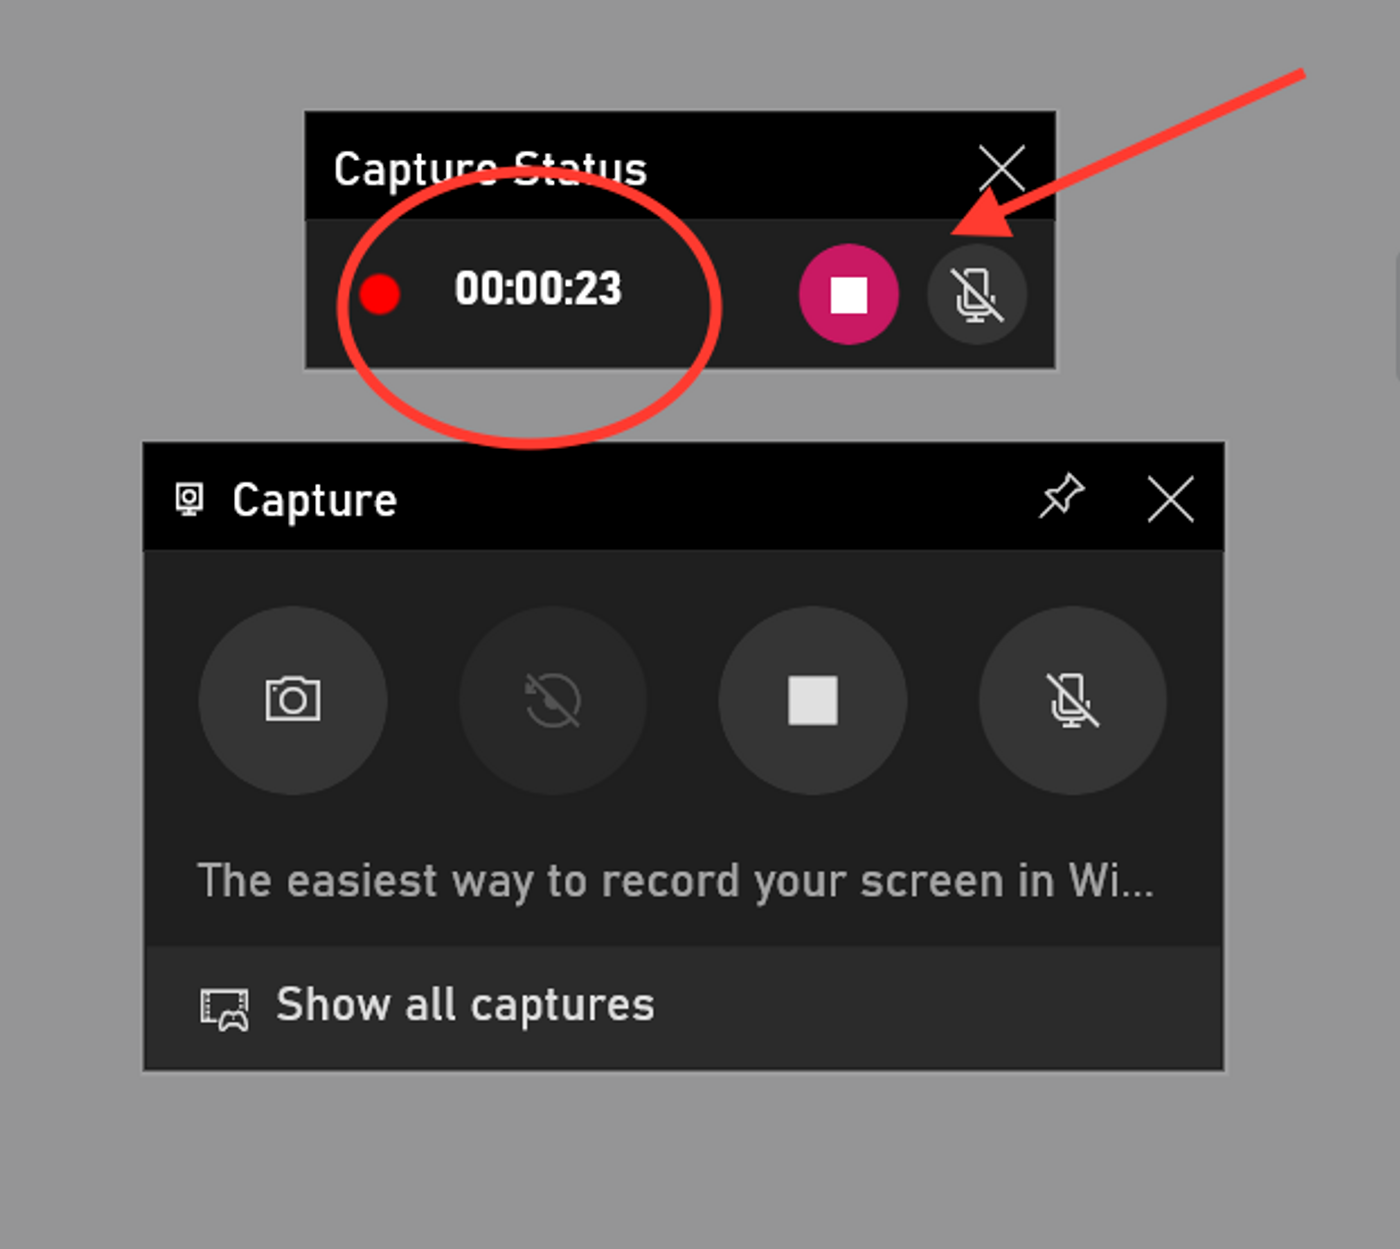
Step 5: Click on the stop button or press Windows + Alt + R again to stop recording.
Step 6: A pop up will appear on the right side saying ‘Game clip recorded’. Click on the pop-up to see that your screen recording is saved in the ‘Captures’ folder in File Explorer.
